How can I export my projects into Scrivener for iOS?
If you want to export your projects to Scrivener for iOS, follow the steps below:
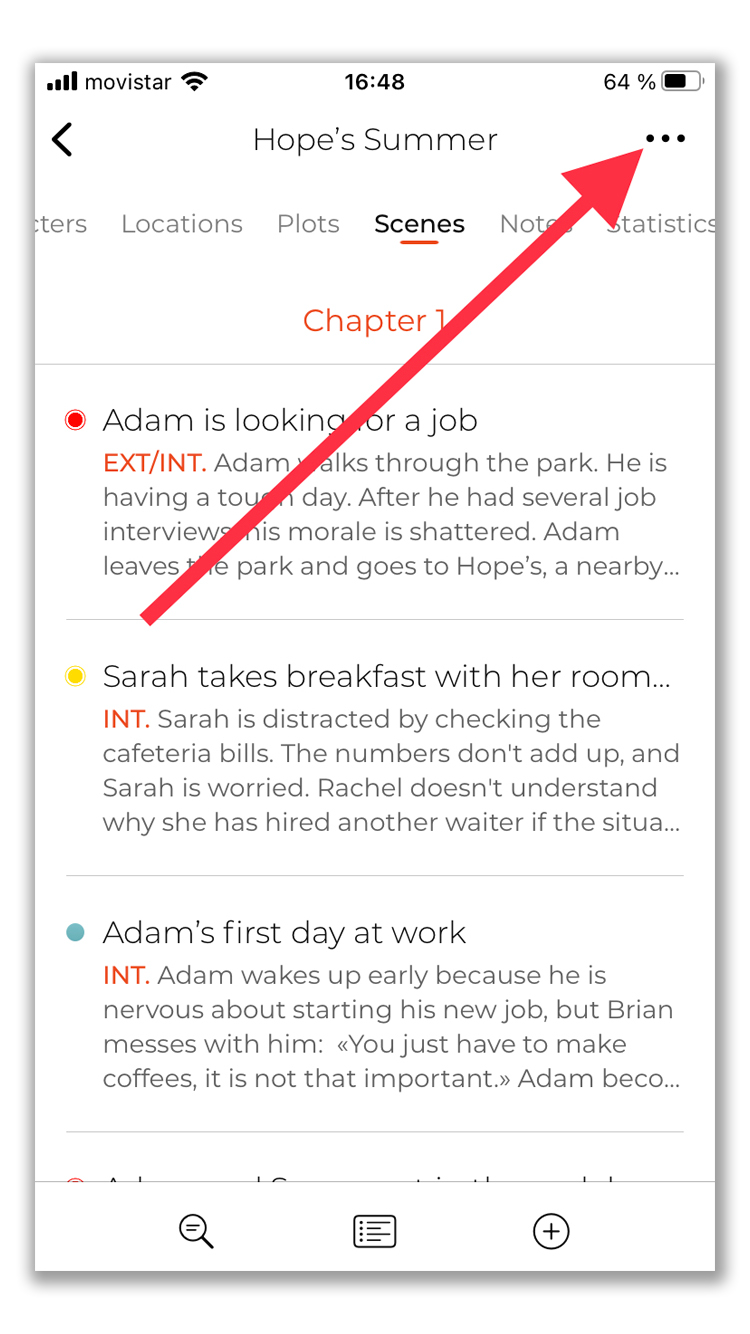
1. Open the project you want to export and tap the "three dots" icon.
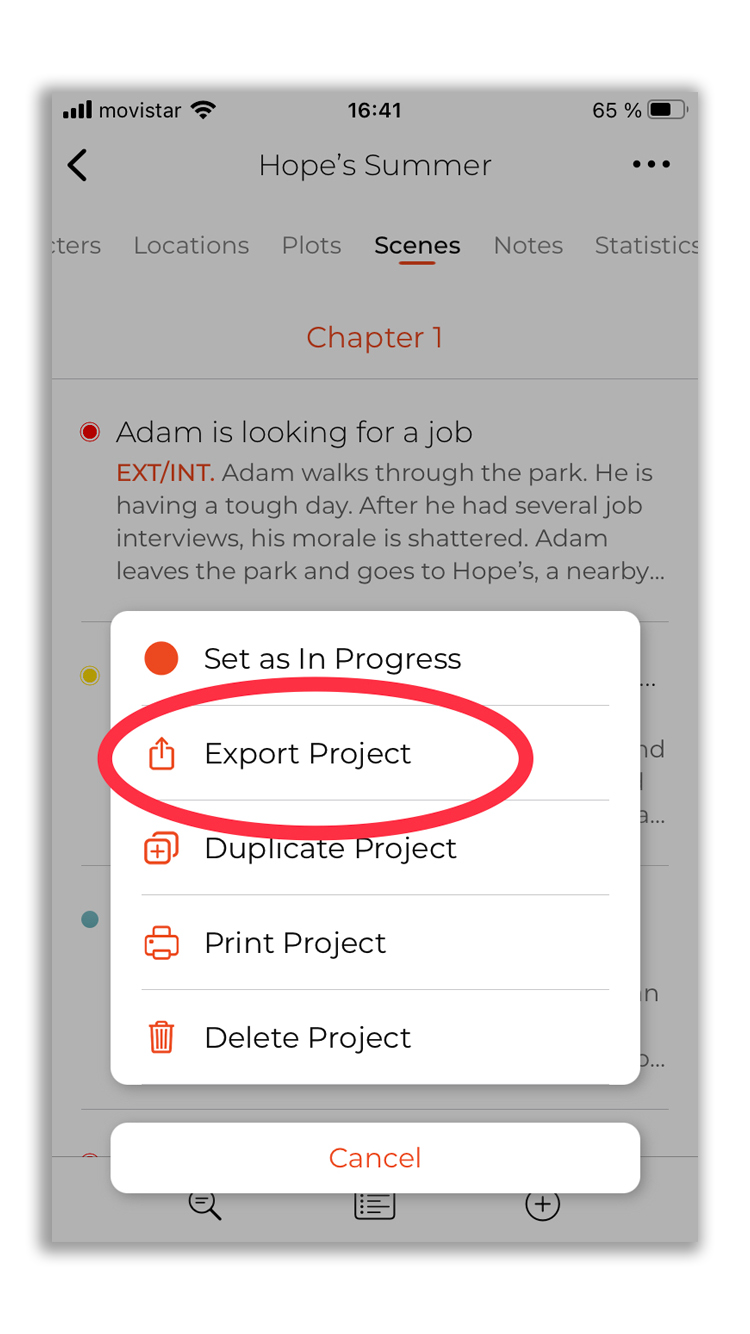
2. A new menu will appear, select "Export Project".
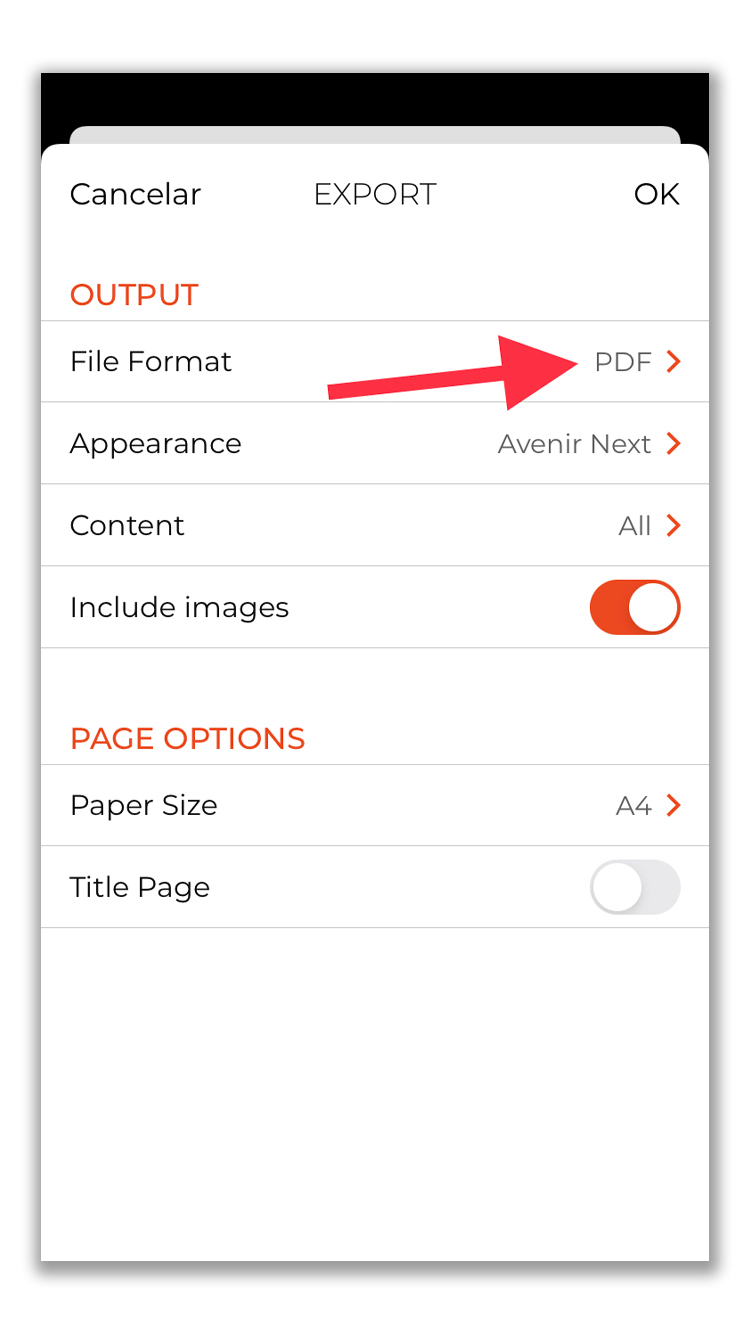
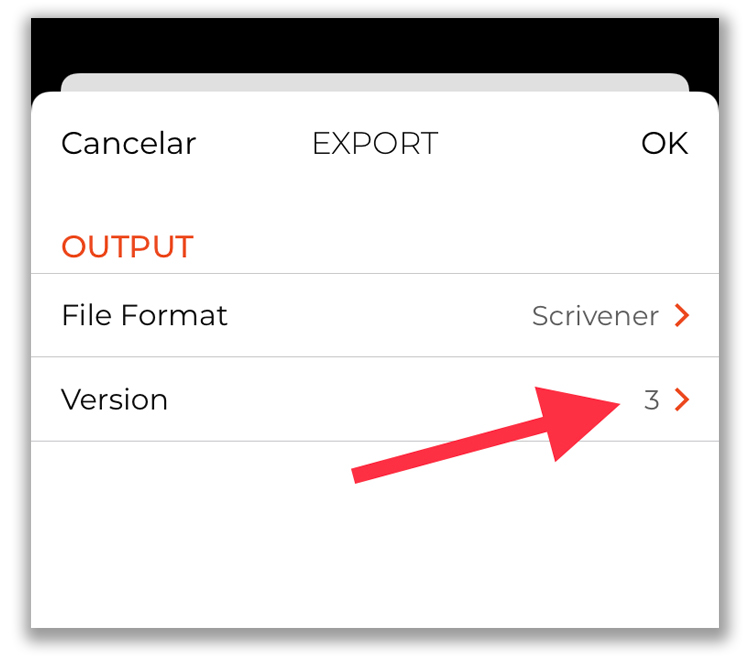
3. The export tool will appear. Tap "File Format" to change the format to export.
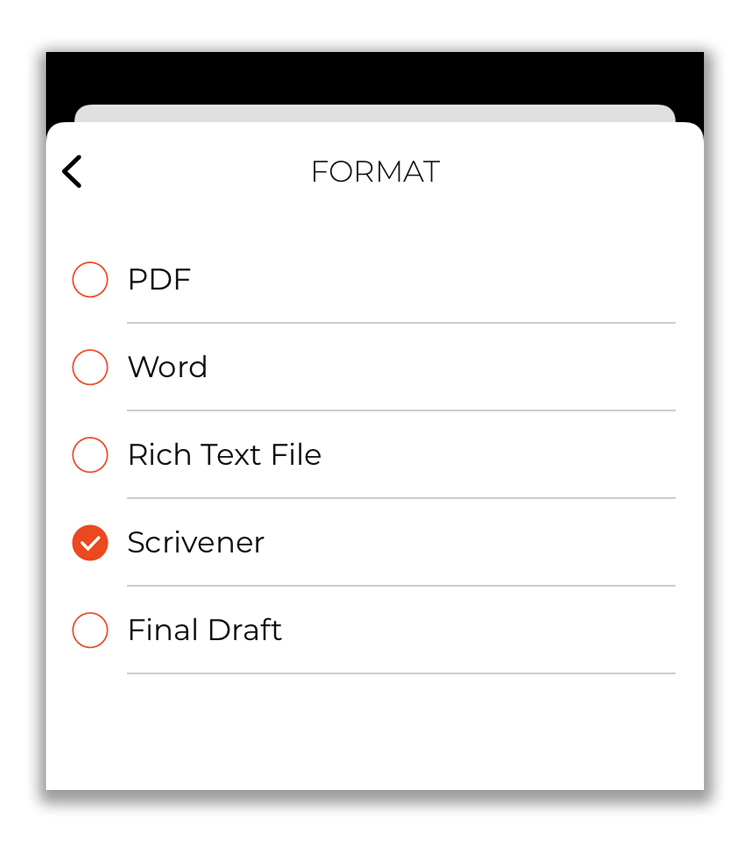
4. Select "Scrivener" and go back to the previous screen.
5. Choose "Scrivener 3".
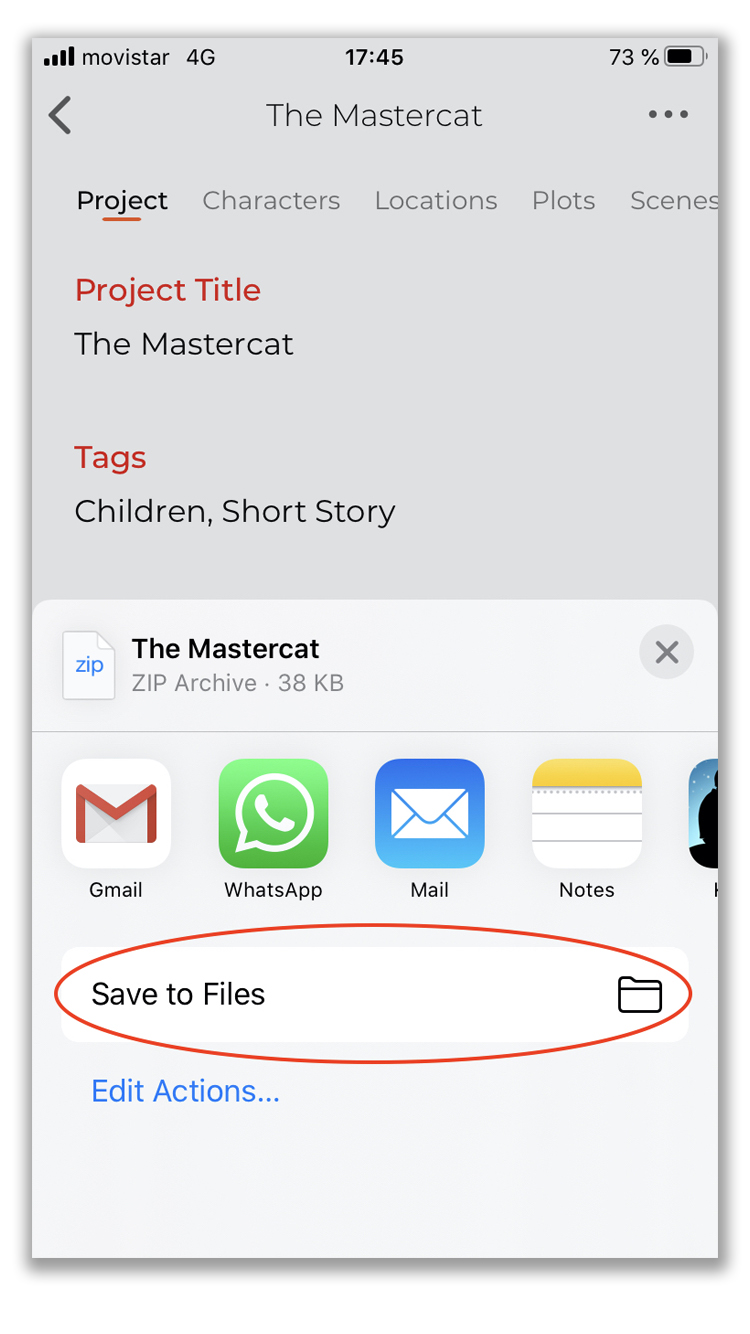
6. You will now see the iOS Actions Menu. Tap "Save to Files":
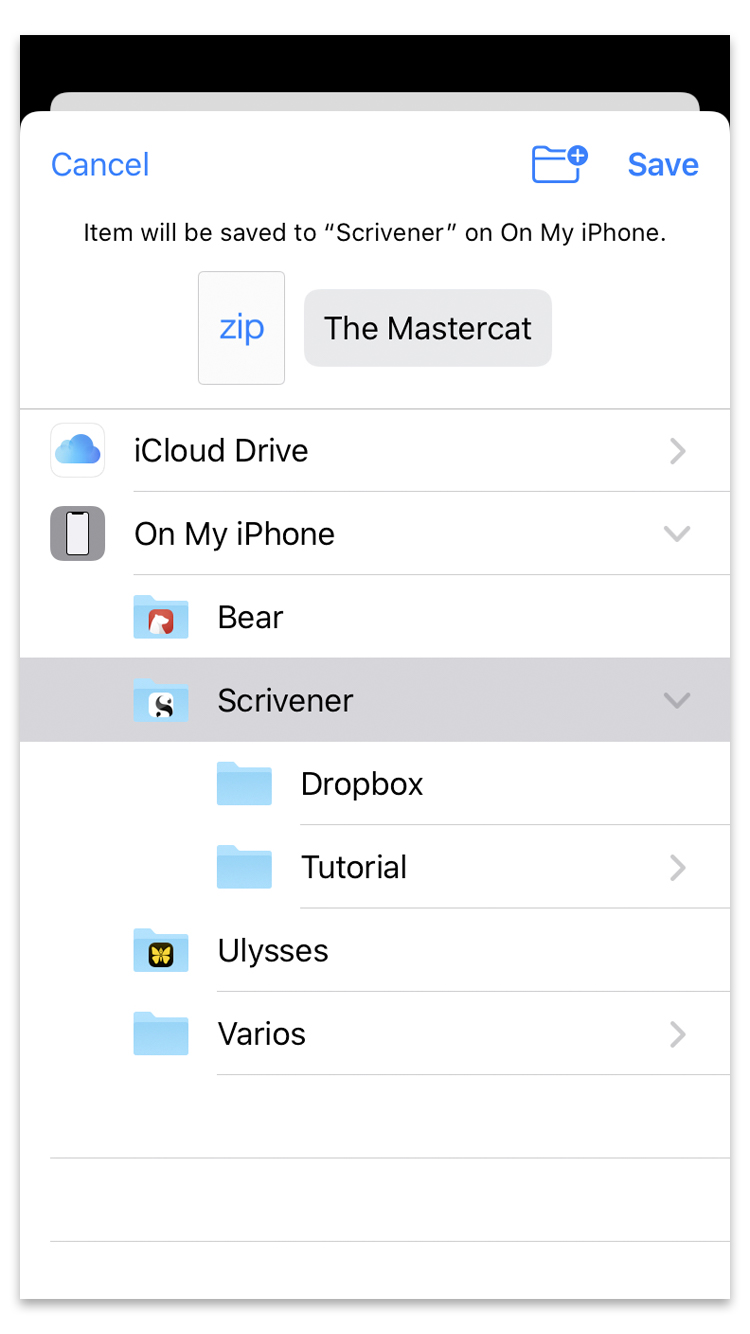
7. Choose the folder "On My iPhone > Scrivener" to save the file (or "On My iPad > Scrivener" if you are using an iPad). Alternatively, you can choose the folder "Scrivener > Dropbox" if you use Dropbox to sync your Scrivener app.
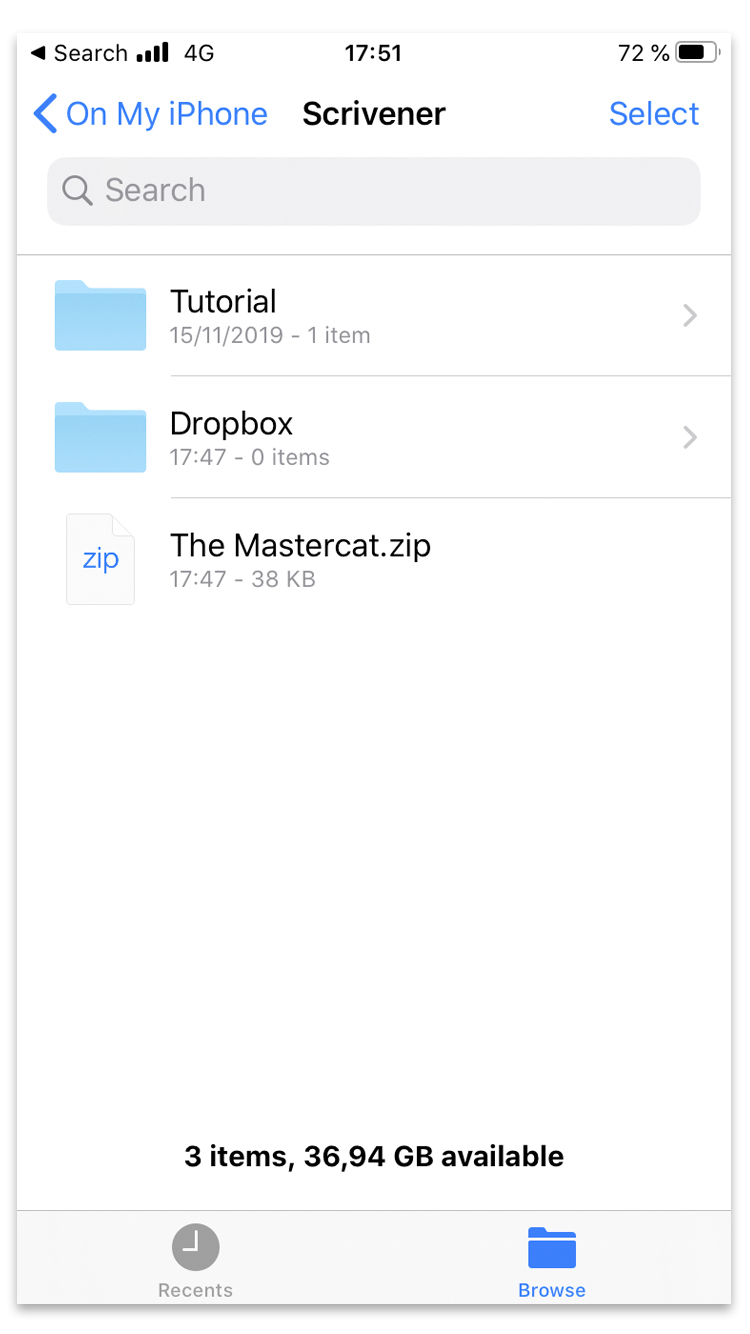
8. Once the file is exported, open the app "Files" and navigate to the folder where you saved it. You will see that the exported file is in .zip format. Note that you cannot open a zip file on Scrivener for iOS. You need to unzip it first, so check the next step.
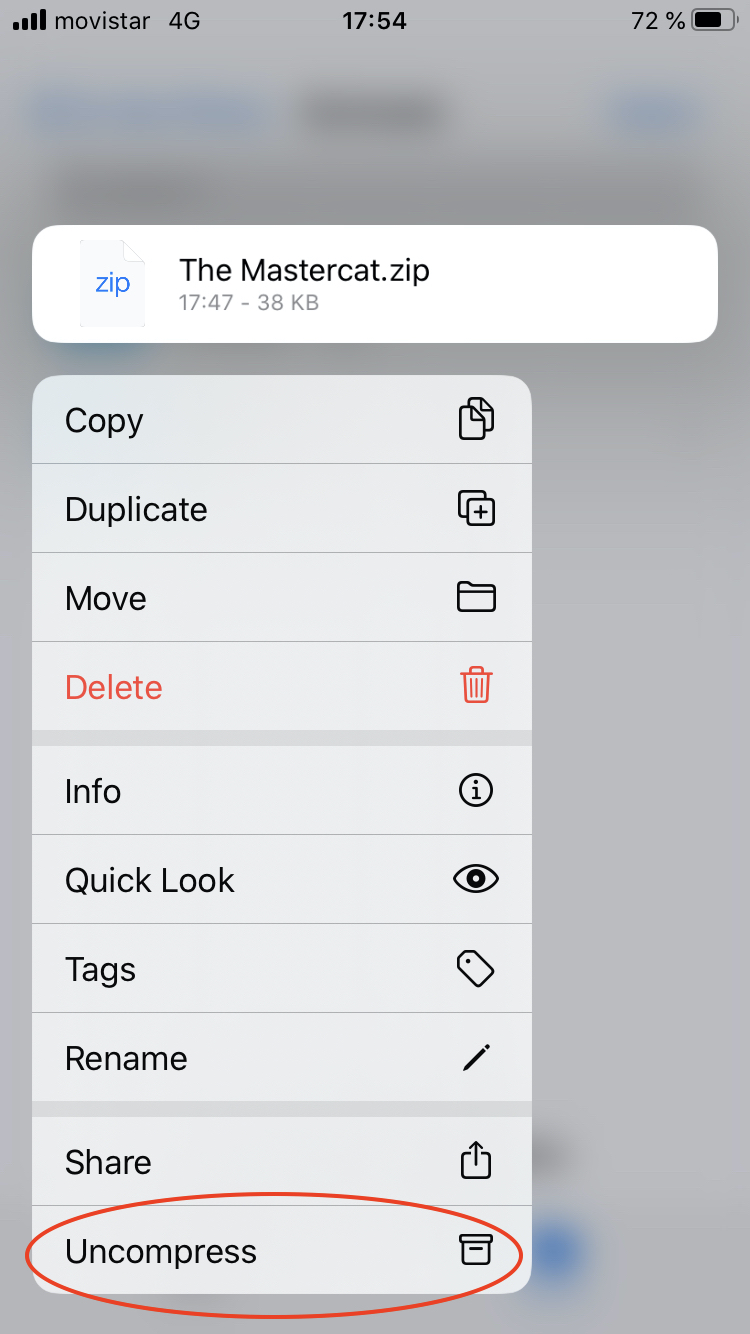
9. To unzip the file, touch and hold over the zip file until you see a menu. Tap "Uncompress" to extract the files.
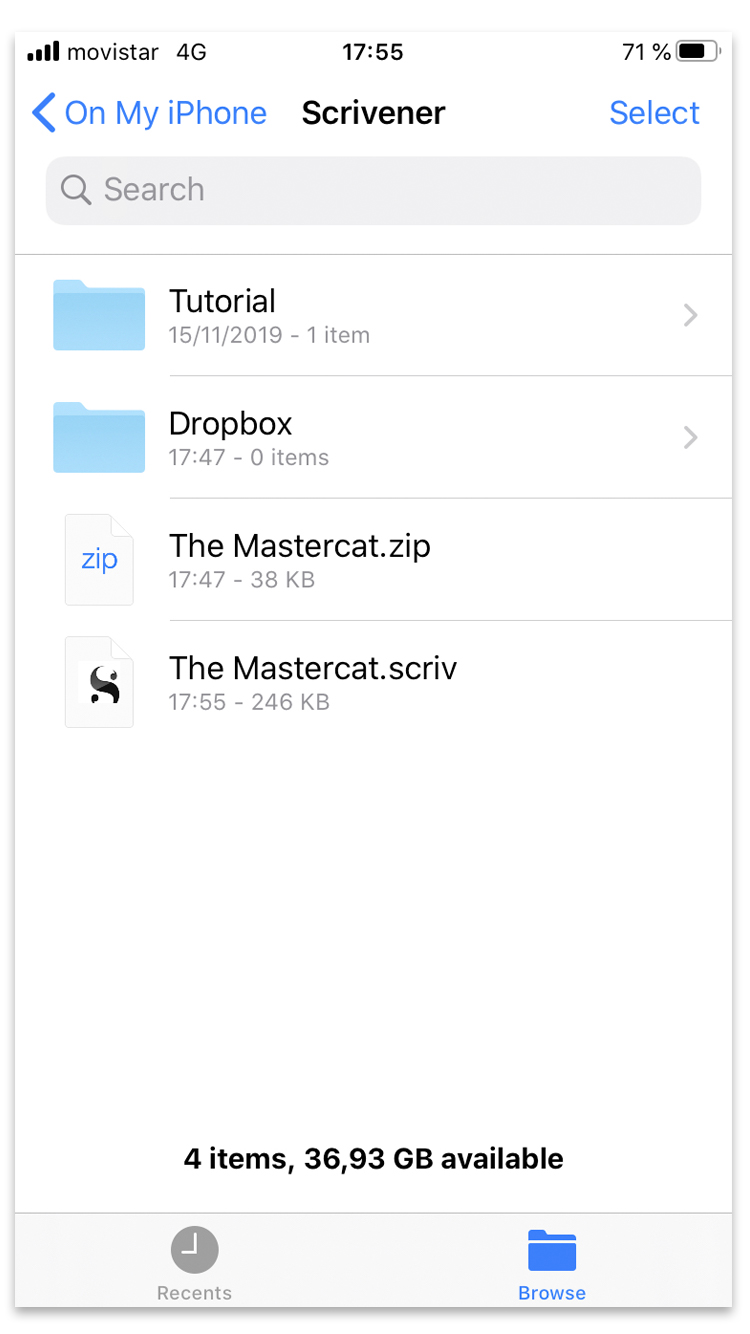
10. You will now have two files: the compressed .zip one and the .scriv one. You can delete the zip file and then touch over the .scriv file to open it.
11. Now you can open Scrivener for iOS and your project will be there, ready for you to start working on it.
Happy Writing!
